Seeking New Executive Director

Growing Chefs is seeking a new Executive Director. Here’s the nitty gritty.

We are a dynamic charity that works with food professionals and educators to get kids excited about healthy, sustainable food. For close to 15 years, we’ve been growing our programs and our links in the community. We plan to continue building on a successful foundation to become one of the leading education and advocacy organizations in our field. 

We have a caring people culture in which we value our staff and nurture their growth. Interested in joining our team?

We are no longer accepting applications.

Week Three - Meet the Master Gardeners

MGA Q&A Series (1).png

We are into eek three of our Garden Q&A Series with the Vancouver Master Gardeners. In case you didn’t catch the first two weeks, be sure to read our blog posts on ‘Summer Harvests, and Winter Crop Planning’ here:

You can submit your questions via our social media accounts, or by email to christine@growingchefs.ca.

This week, we would like to introduce you to a couple of the Master Gardener students who have been working hard to share with you, their passion for growing food, and the great knowledge that they have.

Meet Master Gardener Student Bev!

A2AEE28A-A33A-4888-9462-1C7AF2449E56.JPG

What got you into growing food and wanting to complete your Master Gardener training?

Hello Fellow Gardeners!

Growing up I didn’t have a lot of exposure to fresh vegetables. My grandmother always had rhubarb growing at her front door and would make pies with it, combining it with apples or strawberries, but other than that, most of what I knew about vegetables came from a can. I’m not talking about the canning you do when you grow and can your own food so you have amazing treats throughout the winter. It was can opener stuff!  I’m likely dating myself by saying that, but we also had a milkman and breadman who delivered these essentials to our home every few days. We didn’t have a car and there were no corner or grocery stores around my neighbourhood. As a family of 8 kids, my amazing single-mom would go grocery shopping once a week and someone had to be home for the grocery delivery because she went right to work after shopping. It was like Christmas every week! My sister and I would open the boxes praying for a box of sugary cereal, or some other treat. We did have more fresh food on holidays like Christmas, Easter, and Thanksgiving. My Mom did love fresh corn which would show up on our dinner table in the late summer, early fall. These memories shaped my early understanding of where food came from. I took a course on the sociology of food in my undergrad which made me realize that our relationship with food is complex and changes the more we learn about it and appreciate it.

My interest in growing my own food didn’t really start until about 14 years ago, when I had some space to grow it. I started with tomatoes and lettuce, which seemed like a good match up. We had so much lettuce I made lettuce soup. It was actually pretty good if you add potatoes which thickens it up. From there we eased up on the lettuce and started garlic, which is amazing fresh and one of the easiest things to grow if you make sure you rotate your crop every year. The onion family (of which garlic is a member) is susceptible to root disease.

What is your favourite food to grow?
Green beans are my favourite and I typically pick them right off the vine and eat them raw. This year I’m growing cucumbers for the first time. It’s going very well, but I have to admit I didn’t think about how quickly they would grow and how having a structure for them to grow up (to stay off the ground) is essential. I managed to cobble some tomato cages and string together to help with that.

Can you share with us some of your best garden hacks or advice?
My best advice about food gardening is plant what you love to eat but try new things every season. Being able to make a simple salad with fresh veggies from your garden, is one of the simple pleasures of life! Oh, and always share with your neighbours…they may have something you’ve never tried. Happy gardening!

Meet Master Gardener Student, Jennifer!

Jm_patiogardeningphoto_Aug14.jpg

Tell us a little bit about yourself!
Hi Growing Chefs!

I'm Jennifer Martin, a retired Food Scientist, who maintains a cooperative, urban garden in the city and a large, challenging coastal garden on the Sunshine Coast which I'm trying to restore, back to its native glory.  I grow herbs, fruits, vegetables & perennials, especially ones that attract pollinators and beneficial insects. On the coast, I have mostly native woody plants, shrubs and trees, including some conifers that are over a 100-ft tall.

What are some of your favourite culinary uses of the plants that you grow?
I love herbs, especially the perennial ones, like Rosemary, Lavender, Thyme & Sage. Have you tried adding crispy sage to your pasta? Just cook the sage leaves in melted, browned butter until crispy then add it to your favourite ravioli. And for a really special treat, make honey lavender ice cream.  Simply add the culinary lavender flowers (any English variety) to a spice bag and steep them (like tea) in the heated cream mixture until you get the desired flavour. The longer you steep, the stronger the lavender flavour will be. It's delicious!

Can you share with us a fun tidbit of your knowledge around growing food?
Did you know you can grow vegetables from food scraps?  While you may have done this with a potato, you can also regrow basil, mint, cilantro, celery, romaine lettuce and even onions!  Make sure there is at least 2-3 inches of stem, then just place their ends in water until they grow roots.  After they have rooted you can replant them in soil and let them grow to full size again before eating. Start with green onions, they're the easiest and make sure to place them in a sunny location in your house to encourage root growth . This is recycling at its best!

Meet Master Gardener Student, Sally!

IMG_3122.jpeg

What led you to your passion of growing and gardening?
My first career was focused on the built environment. I studied 3-dimensional design in England in the late ‘70s before moving to the West Coast in 1981. My passion for design carried me through four decades in the corporate world in Vancouver as a consulting interior architect. I loved the job, always finding new things to learn, opportunities for creativity and developing new skills, and working with wonderful clients and colleagues. As a professional designer I became conscious of the giant footprint that design and construction have on our environment and I committed to practicing sustainable design. In the early years these concepts were considered optional and extravagant. Now, thankfully, these ideas and processes are being adopted as non-negotiable and essential.

 Even as a young child living in Barbados I remember my parents giving me a wee corner in their yard, and having my own little garden. My passion then was coleus. So many gorgeous colours and leaf shapes, and in that climate they were perennials. 

 What are you most excited about in your Master Gardener training?
Over the years I’ve had a number of other gardens, and have made just about every gardening mistake in the book. I certainly wasn’t born with a green thumb. Yet, the natural environment has continued to lure me. I find every aspect of the plant and animal world fascinating. Taking the Master Gardener training has been a gift. What propelled me to take the course was realizing I wanted to know a lot more about the art and science of growing things. The classes covered topics I didn’t initially think would be of much interest, such as entomology. Turns out, bugs are riveting! And the drastic decline of beneficial insect populations means we need to restore and develop habitats to bring them back. 

For me, what connects design and gardening is the notion of ’nurturing’. If ecology is the relationship between organisms and their environments then my previous focus was on humans and their relationships with the built environment. Now the focus has shifted to all living things and the natural environment. My image of what a beautiful garden should look like has changed in this process. Once, a manicured, European show garden was my idea of heaven. Now, gardens with wonderful soil, less formality, habitats for beneficial insects, places that celebrate the life cycles of plants - these feel right. A landscape designer I admire tremendously is Piet Oudolf from the Netherlands. And of course our own most famous landscape architect is Cornelia Hahn Oberlander, a local treasure who has been a passionate and early proponent of rewilding, environmental protection and liveable urban landscapes.

My garden for the past few years has been a tiny city one near Vancouver City Hall. It’s south facing, yet very shaded from the magnificent trees that line the street. Growing vegetables is challenging (ok, impossible) and so it’s filled with shade-loving perennials. In the autumn the trees shed their leaves and provide a fantastic leaf mulch throughout the winter. Under what appears to be dead or dormant, the soil is teaming with life, and the circle continues next spring. 

Week Two (Part Two) - Successful Summer Harvests and Winter Crop Planning

We hope you’re enjoying our Gardening Q&A’s with the Vancouver Master Gardeners. This is part two of the second round in a series of six that gives us the opportunity to tap into the wealth of knowledge of Master Gardeners in our community.

These Gardening Q&A’s are focusing on Successful Summer Harvests & Winter Crop Planning - send in your questions today to be featured in our next blog post! Now, let’s dig in, and learn together!

Question from Lesley in New Westminster:
I am growing leeks and cabbage for winter harvest. Any other crops I should grow?

Answer:
Yes many! We’re fortunate to live in a region with a climate that makes year-round vegetable gardening possible. To quote from Linda Gilkeson’s August 8th blog:

“This month we are coming to the end of the seeding season for winter harvest vegetables. With the cooler temperatures this week, conditions are ideal for sowing lettuce, spinach and other leafy greens (leaf mustard, leaf radish, Chinese cabbage) as well as winter radishes and daikon. For sowing this month, choose frost hardy lettuce varieties to extend your harvest all winter. There are some excellent hardy lettuce varieties, including ‘Winter Density’, ‘Rouge d’ Hiver’, ‘Arctic King’, ‘Continuity’ (AKA ‘Merveille des Quatre Saisons’).” 

These can be sown up until the end of this month, along with arugula and corn salad, which is a super-hardy lettuce substitute for winter months. The leaves are small (so grow lots), but the plant is indestructible in winter ice, snow and below-freezing weather. 

If you haven’t sown kale, collards, leaf beet, or Swiss chard before this, try to find seedlings to transplant, as it is getting too late to start these larger plants from seed. If you are sowing now, plant immediately (today!) and make sure seedlings grow as quickly as possible: thin them as soon as they come up and provide plenty of water and nutrients (enrich the soil with blood or fish meal, fish compost, alfalfa meal or other amendments higher in nitrogen). 

dab990000ac70af68428b0c7aefa9b2b.jpg

Today is Spinach Day at my house as this is perfect timing to sow spinach for fall, winter, and spring harvests: days are short enough now that most spinach seedlings won’t bolt even in hot weather. Spinach does best if it is protected from heavy winter rain by being grown under the overhang of a roof or in a cold frame (see photo above) or tunnel. 

Mulch the soil around the plants in November to protect the roots. And no matter how battered your plants are by winter weather, don’t give up on them, because most will survive to sprout a whole new crop of leaves in March and April.” If you hurry, these other winter crops can be sown up until early August: leaf turnip/mizuna, sweet onions, and scallions, broccoli raab. 

Cilantro can also be sown in late August to mid-September. If planted in October, Garlic will have time to grow a large root system before it starts to make bulbs in May and June for harvest in mid-July. Broad beans or Fava beans: sow in October, harvest in spring. 

Linda Gilkeson has created a handy chart When to Plant for Winter Harvest.

Digging in with the Kids - Growing Chefs Integration Idea:

This is a great opportunity to introduce kids to garden crop planning. Have them pick a couple of crops they would like to grow, and research together what the plants need to thrive, and when to start the seeds. This is a great opportunity to practice reading and writing while making a great garden plan together!

Question from Susan in North Vancouver:
What lettuce varieties do well in fall/winter?

Answer:
Frost-hardy varieties that overwinter include Winter Density, Rouge d’Hiver, Arctic King; there are also these that do well both summer and winter: Continuity (aka Merveille des Quatre Saisons), All The Year Round. West Coast Seeds Winter Blend is a traditional French mesclun recipe. They also have Red Sails, Capulin and Vit Corn Salad Mache among several other winter lettuce varieties.

Question from Susan in North Vancouver:
When do I plant garlic?

Answer:
If planted in October, garlic will have time to grow a large root system before it starts to make bulbs in May and June for harvest in mid-July.

Question from Lauren in White Rock:
I am wondering what would be the best plants to grow for a kitchen windowsill garden this winter?

Answer from Jennifer:
Hi Lauren, if you are trying to grow on a kitchen windowsill, I assume you will be restricted to smaller size pots so I think herbs are your best option. You will need to choose herbs that grow in shady conditions because there are fewer hours of sunlight during the winter months. You might consider sage, mint, marjoram, parsley, and chives. 

If you want to grow sun-loving herbs, like basil & rosemary, you will need a southern exposure and you will need to supplement with some artificial light in order to achieve the 6-8 hrs of sunlight that these herbs require. If your home is dry, you might consider misting or placing your planters on top of pebbles placed in a water tray. 

As your cold frame is larger and outside, hopefully in a sunny location (south or west exposure) you could consider lettuce, radish, carrots, onions, spinach, arugula, beets, leeks or any hardy vegetable or herb that the size of your cold frame will accommodate at harvest time. The highest-yielding winter vegetables (based on commercial farm conditions) are onions, carrots, spinach, and lettuce. I'm glad you are considering a winter garden as some vegetables (carrots, scallions, kale) can be much tastier grown over the winter months. Good luck!

Digging in with the Kids - Growing Chefs Integration Idea:

Here at Growing Chefs, we are big believers that you can grow in any space! We are typically in classrooms in the fall, and have had great success growing our indoor windowsill gardens with kids. Yes, sometimes our indoor windowsill gardens do not take off, but we have a lot of fun learning about how plants grow and develop in different conditions. We make sure to add in an element of science by tracking the growth of plants and making hypotheses about what we expect will happen with different variables like temperature, light, growing container, soil, etc.

For container growing, check out our blog post on using different recycled materials to grow in here! Keep an eye out for our Fall Growing Chefs at Home program where we will feature a 2-part video series on ‘Plant Growth Science Experiments!’

Week Two (Part One) - Successful Summer Harvests and Winter Crop Planning

Welcome back to another week of Gardening Q&A’s with the Vancouver Master Gardeners. This is the second round in a series of six, that gives us the opportunity to tap into the wealth of knowledge of Master Gardeners in our community.

Thank you for sending in all of your questions! We received so many that we will be splitting the responses into two separate posts this week - so stay tuned! These Gardening Q&A’s are focusing on Successful Summer Harvests & Winter Crop Planning - send in your questions today to be featured in our next blog post! Now, let’s dig in, and learn together!

Question from Karen in Vancouver:
What’s happening to my tomatoes? Any idea what is causing this disfigurement?

Answer:
Great to see you growing tomatoes as they are not the easiest to grow in our climate! Tomatoes like warmth but not excessive heat. It looks like your tomatoes have yellow/green shoulders disorder. It is not exactly clear what causes it, but in most cases, it’s due to extreme temperature change of unusually hot weather (over 32 degrees Celsius) which we did get at the end of July. If the fruit is exposed to strong sunlight and intense heat, this disorder can occur. If you’re growing these in a greenhouse, you have to be particularly mindful of excessive heat as the temperature in a greenhouse can increase quickly. 

One way to prevent yellow/green shoulder is to ensure that you’re not over-pruning your tomatoes and taking all the stems off. The leaves provide necessary shade during these hot periods and also give your tomatoes better flavour. Pruning off “suckers” between the main stem and the leaf stem is fine though. A potassium deficiency in your soil can also cause this disorder, so you may want to consider getting your soil tested. Potassium is a primary plant nutrient which helps to develop strong roots and stems. It is unlikely you have a root issue, as the ripe part of the fruit looks great! Just cut that yellow part off and they’ll be good to eat.

Digging in with the Kids - Growing Chefs Integration Idea:

Last week we talked about getting the kids involved with picking suckers off of tomato plants. Check it out here - but good to note that in this case, we must be careful to not over prune! Another fun activity which can be a perfect fit for unsightly fruit and vegetables, is to think about different preserving methods that we could use to transform our food, and keep it longer. Stay tuned for our Growing Chefs at Home program this Fall, we will be covering the topic of ‘Food Preservation’ - canned tomato sauce anyone?

Question from Susan in North Vancouver:
Can I plant peas in the fall?

Answer:
No, unfortunately not in our area. While they grow best in cool, humid weather, temperatures below 10°C will kill the plants. Of course, if you have a greenhouse with cool but not freezing temperatures, they would grow there. To quote from Linda Gilkeson’s Newsletter April 30, 2018:

“You can sow peas every month through June to ensure fresh peas into October. I start my early plantings of peas in vermiculite indoors to avoid the main egg-laying period of pea leaf weevil, which is now common in my area. The weevils have one generation a year and only lay their eggs in the spring. Peas planted later than mid-May after the egg laying period are done generally to escape damage from the weevil larvae, which eat the nitrogen fixing nodules on the roots. Pea attacked by weevil larvae can’t make their own nitrogen, but still grow well if the soil is enriched with nitrogen sources, such as fish compost, blood meal, alfalfa meal, etc. And while I am on peas, this is a reminder to sow varieties resistant to enation mosaic virus (EMV) for peas that will be present in your garden from mid-summer onward. The virus is spread by aphids and usually shows up in mid-summer. So, to summarize my pea planting plans: In March and April, I plant any varieties I want, but start them indoors and compensate for weevil damage by enriching the planting bed with nitrogen amendments. For peas sown in May and June, I choose EMV resistant varieties, sow them directly in the garden and don’t add nitrogen to the soil since these plants can make their own.”

Question from Susan in North Vancouver: 
What soil preparation do I need for winter vegetables?

Answer:
Growing crops in permanent beds is popular in this region for good reason. Compared to a garden plot that is tilled from edge to edge every year, there are several advantages to permanent beds: Once beds are laid out, pathways and growing areas don’t change over the years. Only planted areas need to be fertilized, watered and weeded which saves work and resources. Soil in beds doesn’t become compacted because you don’t walk on it. It can be easier to control weeds between beds when the pathways are permanent. Permanent pathways can provide a refuge for beneficial insects that eat plant pests. 

If you know that your soil is balanced, healthy and has supported summer crops it’s recommended that the soil is left relatively un-worked. Don’t cultivate beds deeply as this destroys soil structure and brings the ‘weed bank’ to the surface (the countless dormant weed seeds in the ground). If you’re unsure about the qualities of your soil, it’s advisable to have your soil tested by a lab (DIY tests are often inaccurate). 

If you’ve not done so this year, add agricultural lime (ground up limestone) or dolomitic lime to raise soil pH above 6.5. The exception to not cultivating deeply is that lime needs to be worked deeply into the soil. But it should only be needed if the soil is particularly acidic. Veggie beds need a minimum of 30 cm soil depth; 45 cm is better. Winter veg needs well-drained soil that won’t get waterlogged over our wet winters. Plants suffer if they are planted where water stands for more than 24 hours. While this isn’t such a problem in summer as soil has time to dry out, drainage needs to be improved to channel water away in winter. 

Easy solutions are to mound up the soil or build raised beds high enough to raise the root zone above the water line. Adding organic matter to soils provides food for the soil microbiome and this, in turn, releases nutrients to plants. 

Sources of organic matter include homemade and commercial compost (especially the fish plus wood waste composts) and leaf mold. 

When you harvest summer veg, cut the stems off at the soil line and leave their roots in the ground to decompose and return nutrients to the soil. Adding organic matter is the single most effective strategy for improving soil. Apply the compost to the top of the soil and work it in very lightly and gently, going no deeper than about 10 cm, with a garden fork. 

To summarize: to prep soil for winter veg, when your bed(s) are empty in late summer add compost, a complete organic fertilizer and lime (if needed). When plants are in the ground, start mulching. This is not optional! Mulches keep the shoulders of root crops from freezing and they insulate the soil. Use ‘fluffy’ mulches such as whole leaves, bracken fern or straw.

Digging in with the Kids - Growing Chefs Integration Idea:

Preparing soil for winter vegetable crops is a great opportunity for kids to get involved by having them create their own compost to add nutrients and food into the soil.  If you grew crops in the Spring and Summer, your soil worked so hard producing lovely food for us, and now it is our time to give back! Have the kids check out our lesson on Soil and Compost - learn how to make your own plant food by ‘Creating Your Own Soil-Arium’ and more videos on soil science, and different composting methods here.

add water - soilarium.png

Question from Selma in Vancouver:
What is a good cover crop for a small veggie gardening space? Can I use a cover crop in between/with my winter vegetables? When is a good time to start with a cover crop?

Answer from Jennifer:
Cover crops are mainly used for commercial vegetable gardens. For small veggie gardens, Linda Gilkeson, our local veggie expert, recommends "interplanting" instead. With interplanting you just plant other vegetables in these open spaces. For example, lettuce is good for this as it can be tucked in just about anywhere between Brussels sprout, winter cauliflower or winter broccoli. Right now you could plant winter harvest vegetables such as winter greens (kale, spinach, chard.) 

West Coast Seeds publishes a free magazine on ‘Harvesting Winter Vegetables’ which is available at most local nurseries if you would like specific information on what to plant and their growing schedules. Mixing plants together is actually good for your garden as it creates biodiversity, attracts more beneficial insects resulting in less disease and a more sustainable garden. Even mixing in flowers is good, particularly if they are pollinators. You can use cover crops if you want but they rob the soil of valuable nutrients that are best used for your vegetables. If you're concerned about weeds, I would recommend a light mulch such as dried leaves or straw that can be used all year round. Mulch also retains moisture, protects the soil from sunscald and it's easy to brush it aside when you need to plant something or to topdress your garden. Mulch will also decompose over time feeding the soil so you will need to keep replenishing it. I hope you will consider interplanting and mulching instead. Interplanting or dense planting, using every available space makes your garden more productive. Timing for interplanting depends on your available space. Once you have harvested one vegetable, you can fill that space with seedlings of lettuce, kale, Chinese cabbage, leaf beet and other vegetables you may have already started in your nursery bed. Linda Gilkeson provides specific information on interplanting on p43 of her book "Backyard Bounty", organic vegetable gardening in the Pacific Northwest. Good luck with your gardening and I hope you will find this approach rewarding.

Digging in with the Kids - Growing Chefs Integration Idea:

Have the kids help collect leaves in the fall around the yard to use as mulch to protect the moisture in your soil, and feed your soil as they decompose. Alternatively, planting a winter pollinator garden with kids is a great way to learn about the importance of pollinators in our food system. Check out our blog post on pollinator gardens here.

Question from Llew in Calgary:
When do you harvest sriracha peppers? What colour?

IMG_1464.JPEG

Answer:
All peppers (Capsicum annuum) love heat and generally require a long warm season to ripen. Sriracha is actually a sauce made up of various types of chilli peppers. There is no pepper called “sriracha” unless the one you have is one that has been created through hybridization of peppers to make a commercially named pepper called “sriracha.” A “hot” pepper can be harvested when the fruit is firm. If you wait until the pepper changes colour (red, yellow, brown, purple) the vitamin-C content increases dramatically. Even if you harvest before the colour of the fruit is not what it should be (but make sure it’s firm), it will continue to ripen and turn red, yellow, brown, purple or stay green! If you pick the fruit when they are green you will likely get a larger harvest. If it’s getting late in the season, and before the first frost, you can pull out the entire plant/bush, hang it upside down in a dry, warm place or put them on trays to dry out.

Digging in with the Kids - Growing Chefs Integration Idea:

Speaking of peppers, invite your kids to be the chef and let them determine the spice level! This template will help you pick ingredients and write a recipe for your very own stir fry and stir fry sauce.

You Can Eat That? Make a Carrot Top Pesto

Working at Growing Chefs! I have the pleasure of working with many chefs, cooks, gardeners and other folks that are passionate about food. It is always inspiring to hear them talk about their favourite vegetables and what they cook with them. I am constantly learning something new about food. That is why I was surprised (but also not surprised) when Selma, our Chef Educator at Growing Chefs!, mentioned in a team meeting that she would be making pesto with carrot tops. “What?” I thought. “You can eat that?” I’ve eaten a lot of carrots in my life so this seemed like a strange thing for me not to know. I happily bought some carrots (with tops) and along with my kid and some help from google made a carrot top pesto. Turns out carrot greens are mildly sweet, easy to work with and totally tasty. During my google research, I learned that you can make a pesto out many types of greens (arugula, parsley, basil etc…) and that pesto recipes are really very flexible (you only need a few key ingredients to make it work and you can easily substitute with what you have). Best of all it is a great way to use greens that are a bit wilted and might otherwise go in the compost. 

We have included a video tutorial of how to make carrot top pesto below as well as the recipe that we adapted below (we have nut allergies in our house so we opted to make our pesto with pumpkin seeds instead of nuts). We have also included a Make Your Own Pesto Worksheet that will help you design your own pesto. I hope you enjoy it and are inspired to make pesto of your own this summer. 


The below recipe is highly adaptable based on your preferences and the ingredients you have available to you. Download our Make Your Own Pesto Worksheet and explore more ways you can adapt this recipe and make it your own.

Carrot Top Pesto Recipe:

Tools:

  • a zipper bag (see below for directions using a food processor/bender)

  • measuring cups

  • measuring spoons

  • knife or scissors

Yield: 1 cup of pesto (enough for about 4 portions of pasta)
Prep Time: 15 minutes

Ingredients:

2 cups cleaned carrot tops
½ cup parmesan cheese
¼ cup pumpkin seeds
1 tablespoon lemon juice
½ cup olive oil
½ teaspoon sea salt 
¼ teaspoon pepper


Instructions:

  1. Clean your carrot tops and cut (with knife or scissors) into very small pieces. Compost the stems that are looking brown.  

  2. Place all ingredients in your zipper bag.

  3. Squeeze out the air and seal it tight.

  4. Crush your pesto (from the outside of the bag) by using a mug, rolling pin or anything else suitable.

  5. Use a spoon to taste your pesto 

  6. Adjust the flavours to your liking

Enjoy as a pasta sauce on sandwiches, on salad, meats, fish or tofu.

*If you want to use a food processor or blender, simply place all the ingredients in the bowl of the food processor and blend until smooth. If your pesto is too thick add some extra oil. 

IMG_9100.jpg

Week One - Successful Summer Harvests and Winter Crop Planning

We are so grateful for the friendship and knowledge that students from the Vancouver Master Gardeners are providing our community with, to support in successfully growing food.

This is the first in our series of six Gardening Q&A’s focused on Successful Summer Harvests & Winter Crop Planning, brought to you in partnership with the Vancouver Master Gardeners and Growing Chefs Let’s dig in, and learn together!

Question from Rachel in Vancouver:
We have a fig tree we grew from a cutting we received four years ago. It is currently nine feet tall and has a handful of figs ripening. In the last couple of weeks, the leaves have started to yellow. We removed them but wondered if that was a mistake. What is happening?

Answer from Sally:
The key to having a good crop of figs in our area is to choose the right variety, as some are better-suited to growing in the Pacific Northwest (example, Desert King, Peter’s Honey, and Brown Turkey are reliable). In warm climates figs crop twice, but if grown outdoors here we can only expect to get one crop a year. Ficus carica – edible fig – is native to rocky, sunny Mediterranean and western Asian sites. They like a lot of warmth, full sun (to part shade), and to have their roots somewhat constricted. It’s good to see this one growing in a pot – that works well because it mimics the constrained, rocky conditions they like. They like a somewhat alkaline soil (pH 6 – 7.8) but the soil doesn’t have to be rich. 

Figs stress easily, so changes to lighting, humidity, or temperature need to be done gradually or they may drop leaves. They do not like the cold and will die back. It’s possible our rather cool spring and early summer have affected it, leading to yellowing leaves. Removing a few yellow leaves won’t hurt. The plant overall looks a bit droopy. In our area the tree needs to receive at least six hours sun a day and ideally be positioned against a south-facing wall to maximize the heat. Since it’s container grown, it needs regular watering- it doesn’t like erratic watering or being allowed to dry out - and feeding.

In spring and summer feed it every week, alternating between a high potassium fertilizer such as tomato food and a general-purpose fertilizer. Mulching around the base with 2.5 – 5 cm of compost will help to keep the soil in the pot more evenly moist. Conversely, figs don’t like to be overwatered. Check the soil 3 cm below the surface. If it’s dry to the touch then it’s time to water. Water deeply until plenty of water comes out the bottom of the pot. Don’t let it sit in water. In winter when they’re dormant, figs need to be protected from the cold either by moving the container to a frost-free place (garage or other sheltered spot), and covering the pot with bubble wrap for insulation. If it can’t be moved then the bare branches should be covered with a few layers of horticultural fleece. The leaf doesn’t appear to show signs of pests such as scale, aphids, mealy bugs or spider mites. The chewed corner and specking on the underside are not indicative of serious problems. The chewing is possibly caterpillar. If it’s only in small areas it shouldn’t be a problem. So, check sun exposure, heat, watering, and fertilizing.

Digging in with the Kids - Growing Chefs Integration Idea:

Invite the kids in your life to help test how dry the soil in your garden is! As Sally mentioned, if you stick your figure in the soil 3cm deep, and it is dry - that means that it is time for more water. This is a great way to engage kids in the garden and help them identify when more water is needed. This can change all the time based on our weather, and when they have a fun trick to use, they often feel more ownership over caring for the garden. Have them stick their finger in up to their first, or second knuckle - noting that the surface of the dirt may dry up before the layers beneath. Let them know that when growing plants, what we see above the surface is only part of what is going on! Often our soil may be dry on top, but have plenty of moisture below the surface - and this trick can help us from overwatering. Have the kids test how dry the soil is with all of your plants, and note how there are changes amongst different containers, and areas of your garden based on their environment and exposure to sun and heat.

Question from Sevan in Pemberton:
The bark on our peach tree is peeling, and it has fallen over. The owners before us attempted to keep it standing with some support. Despite its struggles, the tree is producing gorgeous fruit! Should we do anything more to take care of it, or is it ok the way it is?

Answer from Jennifer:
Hi Sevan, the pictures look like this is a mature tree with peeling bark and a fairly large canker on its trunk. There are a number of factors that could be contributing to the peeling bark. Sunscald and extreme temperature changes are the likely ones, as the tree appears to be in a very sunny location, so if the canker is on the South or West side of the trunk this could be due to sunscald.

Fruit trees have very thin bark so they are more susceptible to this.  It certainly wouldn't hurt to try and shade the trunk portion of the tree during really hot periods and remove any damaged, dried or loose bark around the surface of the wound. If the bark is removed around the entire circumference of the tree (called "girdling"), it will die, but trees can survive smaller wounds.  There are also trunk wraps but these may cause more harm than good because they can create breeding areas for insects and hold moisture in so you need to be careful with this type of remedy. Painting or cementing cankers in trees are also not recommended. Thankfully, this canker does look healed and your tree is producing nice fruit. The bark also looks discoloured and black which could indicate a fungal disease, although the canker looks fairly dry and benign, so perhaps a previous fungal disease. 

Fruit trees are susceptible to fungus diseases so you want to make sure your soil is well drained and there is not a lot of water sitting near the base of the trunk. Usually you see curling leaves and sunken spots on the peaches if there is an active fungus problem. It is hard to tell why your tree has fallen over. It could be poor pruning, unbalanced branch structure, heavy winds, disease or all of the above. 

The concern here is the branches, leaves and fruit touching the ground which creates an entry point for insects and disease. It is always best to keep branches off the ground, if you can, for good air flow and to discourage entry points and contact with the ground. As the tree is producing some really nice fruit (well done!), I would just keep an eye on it and see how it progresses. This darling tree definitely has a lot of character and appears to be a survivor!! Good luck with it.

Digging in with the Kids - Growing Chefs Integration Idea:

This Gardening Q&A sounds like it has great potential for some detective work! Take note of the things to look out for that would indicate disease in your plants. Have the kids in your life join you on an ‘eye spy’ hunt for indications of disease in your plant like Jennifer mentioned!

Question from Johanna in Vancouver:
My tomato plants seem to be growing like crazy but some of them have zero flowers/fruit. Help!

Answer:
Our cool weather so far this year has not been conducive to good tomato growing. The plants will grow lots of large, soft leaves in cooler weather and produce fewer flowers leading to fruit. If you’ve had success with tomatoes in the past then the issue is very likely to be attributed to the cool weather. 

If this is your first time, here are some points to consider. Tomatoes are moderately difficult to grow and need more doting care than many other crops. To grow well, they need the following:

  • Full sun

  • Fertile, well-drained soil that’s high in organic matter, with a pH level 6.0 – 6.8.

  • Warmth, but not high heat. Temps between 26° to 30° are best. Higher temperatures can kill flowers, so if your plants are in a greenhouse that’s getting super hot that could be an issue.

  • Regular watering to keep the soil evenly moist. Don’t let the soil dry out, but don’t let the plants sit in water either. Expect to water about 2.5 cm per week during peak growth. Overwatering produces leaf growth at the expense of flowers. Container grown plants need extra water.

  • Feeding every 10 – 14 days with a balanced organic fertilizer.

Conversely, large-fruited and long-season varieties such as Brandywine don’t ripen many fruits in cool summers (such as ours recently). Vine tomatoes need to have their suckers pinched out (these are the little side shoots growing between the main stem and a leaf stem). If they aren’t pinched out, all the plant’s energy will go into producing shoots, and not flowers and fruit. If you’ve got bush tomatoes you won’t need to remove side shoots. 

Above-ground parts of the plant need to be kept dry, and have good ventilation around plants - they don’t want to be crowded. A purple tinge to the undersides of leaves indicates the plants are not taking up enough phosphorus due to the cool weather (it’s not necessarily that there’s a phosphorus deficiency in the soil). Phosphorus deficiency is linked to less fruit production. Feeding with higher potassium encourages good fruit development. Feeding with excess nitrogen can promote a lot of lush leaf growth and very few flowers/fruit. Bonemeal has an appropriate proportion of N-P-K nutrients: 2 - [11-14] – [0-2] and could be used sparingly. Wood ashes (0-1-5) also have good proportions of flower/fruit producing nutrients. But really, it sounds like the most likely problem has been our very cool early summer. Tomatoes just don’t do well in the cool.

Digging in with the Kids - Growing Chefs! Integration Idea:

Mmmmmmm! One of our favourite things to do in the garden is pinch the shoots on tomato plants! It is totally a kid-friendly activity, and pinching the shoots, and pruning excess leaves to promote air flow gives off the most wonderful aromatics. When you are looking down the main stem of your tomato plant, you will see little ‘shoots’ come out at a 45-degree angle from the ‘elbow’ of the main stem and main branches which produce fruit. See the picture below! You can invite kids to pinch them with their fingers when the shoots are still small, no snips needed. For thicker stems, best to use some snips with adult discretion, and supervision required. Make sure to stop and….smell your hands - it smells so fresh! Ask the kids if the smell reminds them of anything familiar. 

Question from Kim in Vancouver:
I have been harvesting my kale all summer. I know kale can also be grown in the winter but do I need to plant new seeds? Or, will it keep growing?

Answer from Jennifer:
Hi Kim, yes, Kale is a biennial plant (lives for 2 years) so it will keep growing over the winter in zone 8-10 as it is very hardy and can survive temperatures down to -10C\14F. As with all vegetables, it's always good to add a light mulch (eg. dried leaves, straw) to the soil surface to protect from freezing temperatures in winter and hot sun in summer. Kale survives over winter as long as you harvested it correctly by removing the older outside leaves first and leaving the centre stem intact that has the smaller leaves. However, by next Spring this kale plant will bolt and die. It's also a good idea to reseed or transplant small kale plants so you have more plants to harvest from over the winter as kale leaves do not regenerate as quickly in colder months. You will need to get these new plants to maturity before the first frost so timing is critical. Also it's helpful to add more plants now to replace the plants you will lose next spring so you have plants at different stages of their growth cycle (called succession planting). If you are going to reseed,  I would consider some winter varieties such as Winter Red, Rainbow Lacinato, or a winter kale blend. You can pick up a free copy of West Coast Seeds, Planting for Fall/Winter harvests at your local nursery (or view it online here). On p. 8 they list a dozen different varieties of winter kale with planting instructions. You will find similar information on p. 38 of West Coast Seeds Gardening Guide 2020 which is also available at most nurseries (or view it online here). Good luck with your Winter harvest!

Digging in with the Kids - Growing Chefs! Integration Idea:

Similar to pinching the shoots on the tomato plants, have kids help with removing the older, outside leaves to harvest, and leaving the centre intact with the smaller leaves. Also, if you haven’t checked it out already, have your kids watch our lesson video on starting seeds - and have them help with re-seeding more kale plants!

Recipe: Very Berry Smoothie

Very Berry Smoothie.jpg

Looking for a morning (or afternoon) pick-me-up? Try out this delicious, antioxidant rich powerhouse smoothie!

Filled with the perfect amount of protein, quality fats, carbohydrates, and an array of vitamins and minerals, this smoothie is great for growing kids. Not to mention it takes very little time to prepare which is always a bonus when leading a busy lifestyle. 

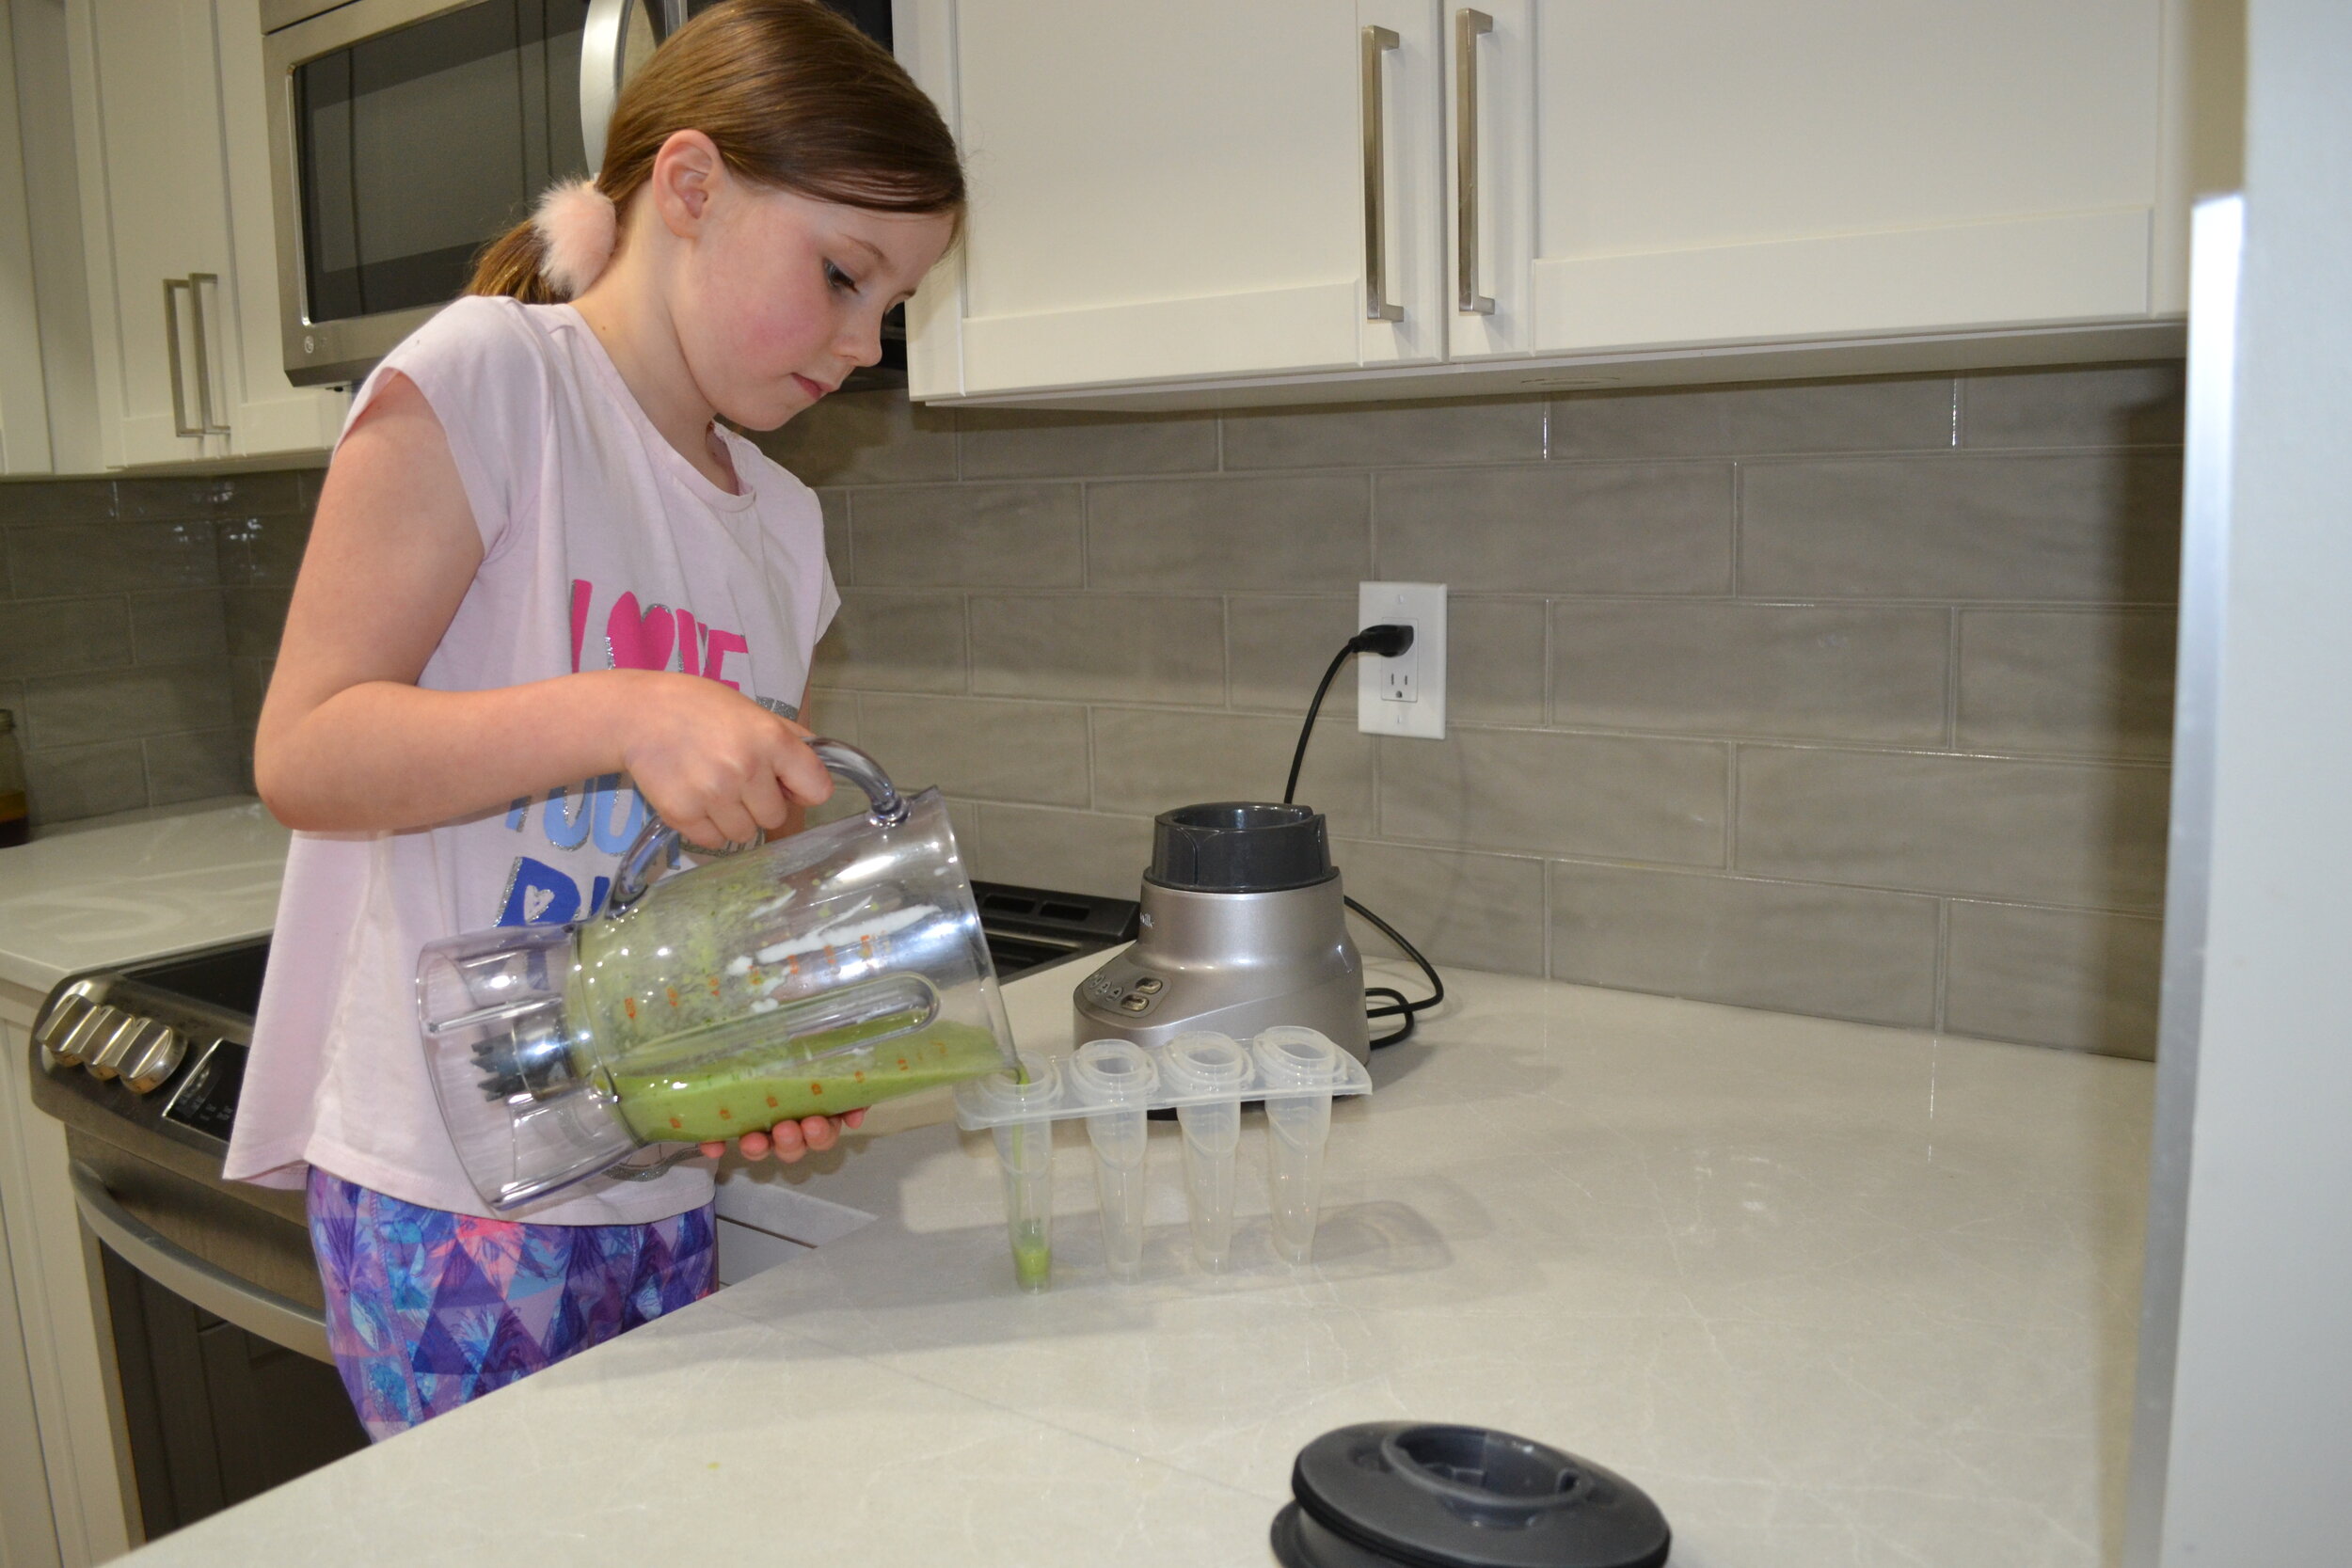
If your child isn’t a fan of vegetables, smoothies are a fun and delicious way to ensure they are included in your little one’s diet. As well, due to smoothies being blended, this helps predigest nutrients and breakdown proteins, aiding in food sensitivity prevention as well.  This recipe can be varied based on what your kid likes and any allergy concerns. Start simple with this smoothie, even starting with just the dairy-free milk and fruit, slowly working your way up to incorporating greens, nuts, and seeds. Ensure that you blend the smoothie until it is a very creamy consistency to your child’s preference. You can also freeze these into popsicles or use less liquid to serve this as a smoothie bowl.

Check out some of the benefits of the different ingredients below. Enjoy, and share with us any photos or stories of your favourite smoothies! The recipe card for this smoothie can be found “here”.

Dairy-Free Milk: With dairy and lactose sensitivities and intolerances on the rise, dairy-free milk provides a great alternative. Store-bought dairy-free milks often have nutrients added to them (vitamin A, D, E, B-vitamins, zinc and magnesium) and home-made ones provide some nutrients as well. When using home-made, the leftover pulp which is packed with nutrients can be used in baking and other recipes. These vitamins and minerals are important for the nervous system, digestive, intestinal, hormone and bone health. Some of our favourite dairy-free alternatives include almond, cashew, oat, coconut and walnut milk.

Wild Blueberries: Berries are incredible sources of antioxidants that help combat free radical damage and inflammation in the body. Berries, especially when combined with protein and healthy fats, can improve blood sugar balance. They are also high in fibre and many nutrients (Vitamin C, K, Manganese to name a few) that are essential for our immune and bone health. Some of our favourite blueberry alternatives are raspberries, blackberries and strawberries. 

Nut & Seed Butters: All nuts and seed butters have incredible amounts of protein, healthy fats and nutrients including antioxidants (vitamin E), calcium, magnesium, zinc and iron. Healthy fats are essential for energy, cell growth, nutrient absorption, hormone production and organ protection. Protein is essential for repairing tissues and hormone and enzyme production. The aforementioned vitamins and minerals are important for bone health, muscle relaxation, wound healing, skin, hair and nail health, anti-aging, and hormone and digestive health. Some of our favourite nut and seed butters include peanut, almond and sunflower butters. 

Hemp Hearts: Not only is this local seed a perfect protein, but hemp hearts have incredible amounts of fibre, iron, B-vitamins, magnesium, manganese, phosphorus and Omega-3’s. These nutrients are essential for fighting inflammation and joint health. Some of our favourite alternatives include chia seeds, pumpkin seeds, flaxseed and sunflower seeds. 

Maca Powder: Maca is a type of adaptogen. Adaptogens are connected with detoxification and stress management. They work to normalize the stress response in the body. They are also considered an antioxidant, working to enhance mood, stamina and endurance, whilst promoting a calming energy. Adaptogens work with the body to promote its own balancing process. Alternatives to this include lion’s mane powder. 

Dark Leafy Greens: Our dark leafies (kale, spinach, dandelion, chard, collards) are great sources of many nutrients including vitamins A, C, E, K and B-vitamins. They also contain tons of fibre, iron, magnesium, potassium and calcium. These nutrients are important for regulating the digestive and intestinal systems, and supporting our bone and hormonal health.

Cinnamon: Cinnamon is an incredible spice, loaded with antioxidants, and helpful in combating inflammation, blood sugar and cholesterol imbalances. For its medicinal properties, ensure that you are using “Ceylon” or true cinnamon (and not Cassia). Other spices and herbs that would go great in this smoothie include cardamom, allspice, pumpkin spice and mint.

Make a Pollinator Garden Activity

Make a pollinator garden full of bee friendly flowers to attract bees to your garden or help support the gardens and farms in your neighborhood. 

IMG_0899.jpg

You Will Need:

  • a plant pot or any container you have on hand (a yogurt container, or used milk jug work well also). Click here for a tutorial on turning a recycled container into a plant pot. 

  • soil

  • a packet of wildflower or bee friendly seeds

Instructions:

  • Research what flowers attract bees in your area. Wildflowers or local flowers are best for local bees. Blue, purple, white and yellow flowers are very attractive to bees.

  • find your seeds 

  • find a container or a place outside to plant your seeds

  • plant your seeds according to the directions on the packet

  • watch your flowers grow and the bees buzz by

  • plant flowers from spring to fall so the bees have a consistent supply of nectar

What is pollination?

Pollination is when pollen is transferred from one flower to another or within one flower. When a flower is pollinated the plant can make seeds and fruit/vegetables. Bees are one way that plants pollinate. When bees land on a flower to drink its nectar, pollen from the flower sticks to the bee’s legs, the bee carries the pollen and spreads to the next flower. 

Some plants like beans and peas are self-pollinating that is why you can grow them inside on your windowsill. Other vegetables like squash and some types of cucumber need to be pollinated to produce fruit and vegetables.

Pollinator questions to ponder or research:

  • What are some other pollinators besides bees?

  • What else can you put in a pollinator garden to help the pollinators? Hint...sometimes bees get thirsty! 

  • What would happen if we didn’t have any bees?

Make a Garden Planter Out of a Recycled Container

You don’t need anything complicated to grow a container garden at home. In this activity you turn a recycled container into a planter pot. Watch the video below or simply follow the instructions to make your own planter.

You Will Need:

  • a used milk, juice or yogurt container (or any container you have on hand)

  • a small amount of soil (about 6 cups)

  • a packet of seeds (we planted wildflower seeds)

  • sharp scissors

  • a pen to poke drainage holes

  • a tray or larger container to catch drainage water (if you like)

 Instructions:

  • clean your recycled container so that it is free of food residue

  • decide what side of your container you want to be the top and what side will be the bottom

  • ask an adult to help poke about six drainage holes in the bottom of your container

  • ask an adult to help cut a rectangular opening in the top of the planter (skip this step if you are using a container with an open top)

  • fill your container about ¾ full with soil

  • plant your seeds according to the package directions

  • find a tray or larger container to put under your container (to catch any water that might drain out) 

  • water gently, place in a sunny location and wait for your seeds to grow

What other recycled items can you grow a garden in? Let us know your creative ideas!


The Coolest Way to Eat Your Greens! Frozen Greensicles

These Greensicles get their vibrant green color from spinach. Including spinach in a popsicle (or smoothie) adds vitamins A and C as well as potassium and magnesium. Making this easy recipe along with kids is fun and will help get them comfortable cooking with and eating greens. For extra fun make up your own name for the greensicles (hulksicles, grasshoppersicles, greenmonstersicles). 

Frozen Greensicles Recipe

Yield: This recipe makes 4 greensicles
Prep time: 5 minutes
Freeze time: 5 hours (or a bit longer depending on your freezer)

Ingredients:
½ cup spinach or other greens
½ cup pineapple (frozen, canned or fresh)
½ cup milk (dairy or dairy free)
½  cup yogurt (dairy or dairy free)
1 banana (frozen or fresh)

Tools:
Blender*
Popsicle molds**

 Instructions:

  1. Place all ingredients in a blender or food processor and blend mixture until it is smooth and creamy and there are no large chunks of spinach left. If your smoothie is too thick add some extra milk, yogurt or water and blend some more. Ask an adult to assist when working with a bender and food processor.

  2. Pour mixture into popsicle molds

  3. Freeze for 5 hours or until frozen

  4. Release popsicles from the molds and enjoy 

Modifications: 
You can add any fruit you have on hand to your greensicle recipe. Some fruits like blueberries will taste great and also change the color of your greensicle. Have fun experimenting with different flavor and color combos.

*If you don’t have a blender you can use a food processor or put all the ingredients in a zipper bag and smush the mixture with your hands (chop the spinach a fine as possible if you are using this method).

**If you don't have popsicle molds you can freeze this mixture in an empty yogurt container and eat it with a spoon like ice cream or “icegreen”.